Despite rumors on the internet — from the GNU website, no less — you can in fact run MIT Scheme on a computer with Apple Silicon (aka, an M1 Mac). This post will provide step-by-step instructions for getting Scheme up and running on a shiny new Mac.
The key is to macOS's built-in emulation system to run the x86 version of MIT Scheme. Scheme won't be running natively on Apple Silicon, but it will be running — and sometimes that's enough.
There are three parts to this setup:
- Download x86 Scheme
- Run Terminal in Emulation Mode
- Fix the Source Code
It's not a pretty solution, but at least it's fairly straightforward, and I estimate that it should take about 15 minutes to follow the setup steps below.
This guide has been tested on MacOS Monterey, version 12.0.1. I would guess that these instructions will apply to any recent version of MacOS.
1. Download x86 Scheme
You'll first need to download Scheme, making sure to download the x86 architecture version.
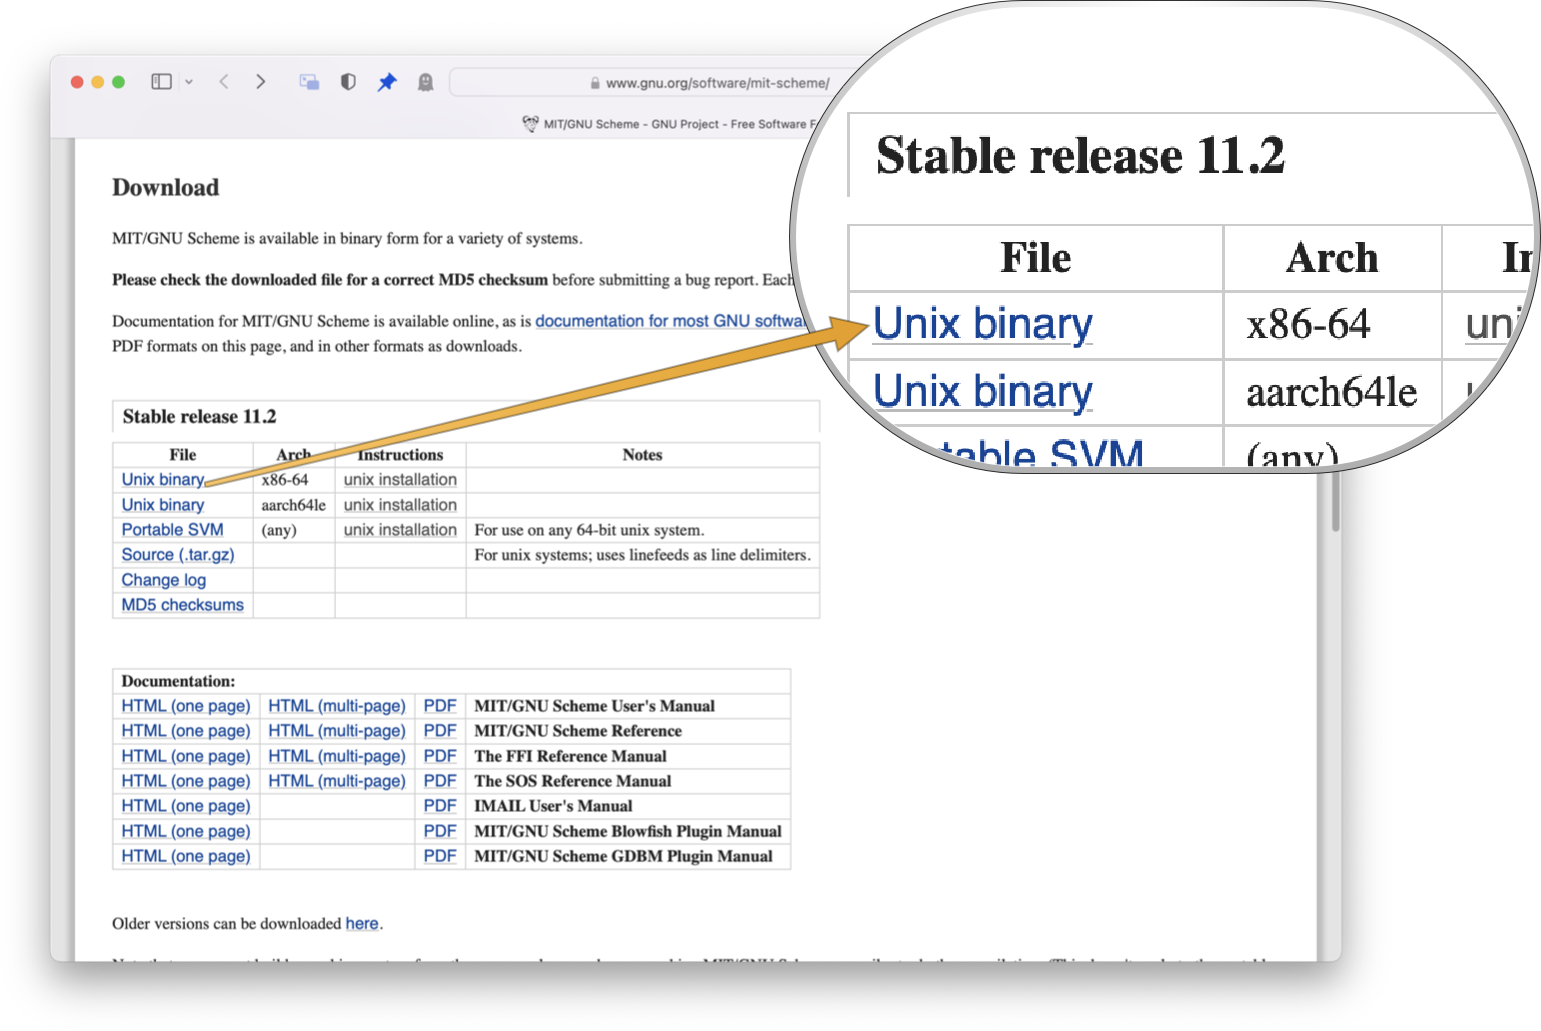
1.1: Navigate to the MIT Scheme page on the GNU website.
1.2: Scroll down to the Downloads section, look at the Stable Release table, and click or download the "Unix binary" link for the x86-64 architecture.
At the time of writing this, the stable version is 11.2.
2. Run Terminal in Emulation Mode
Next, you'll need to run a version of Terminal in emulation mode, to ensure that the compilation step uses x86 instructions.
2.1: Navigate to Terminal.app in Finder. This is most likely in /Applications/Utilities.
2.2: Duplicate the Terminal app by right clicking and selecting Duplicate.
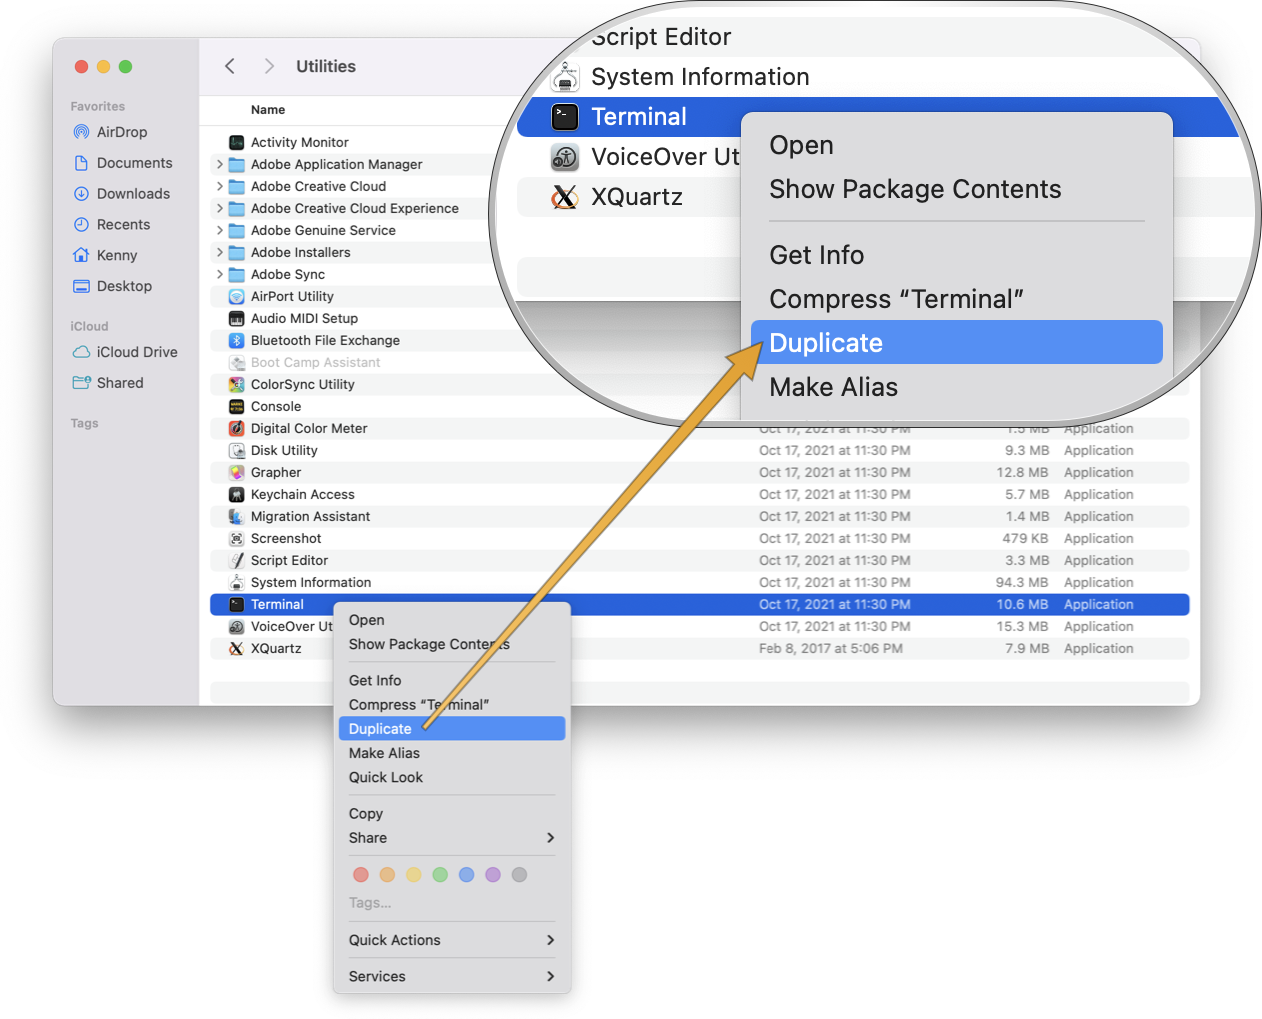
2.3: Rename the newly duplicated Terminal app, so that you can differentiate between the two Terminals. I named mine Terminal (Rosetta) – but the name choice is up to you.
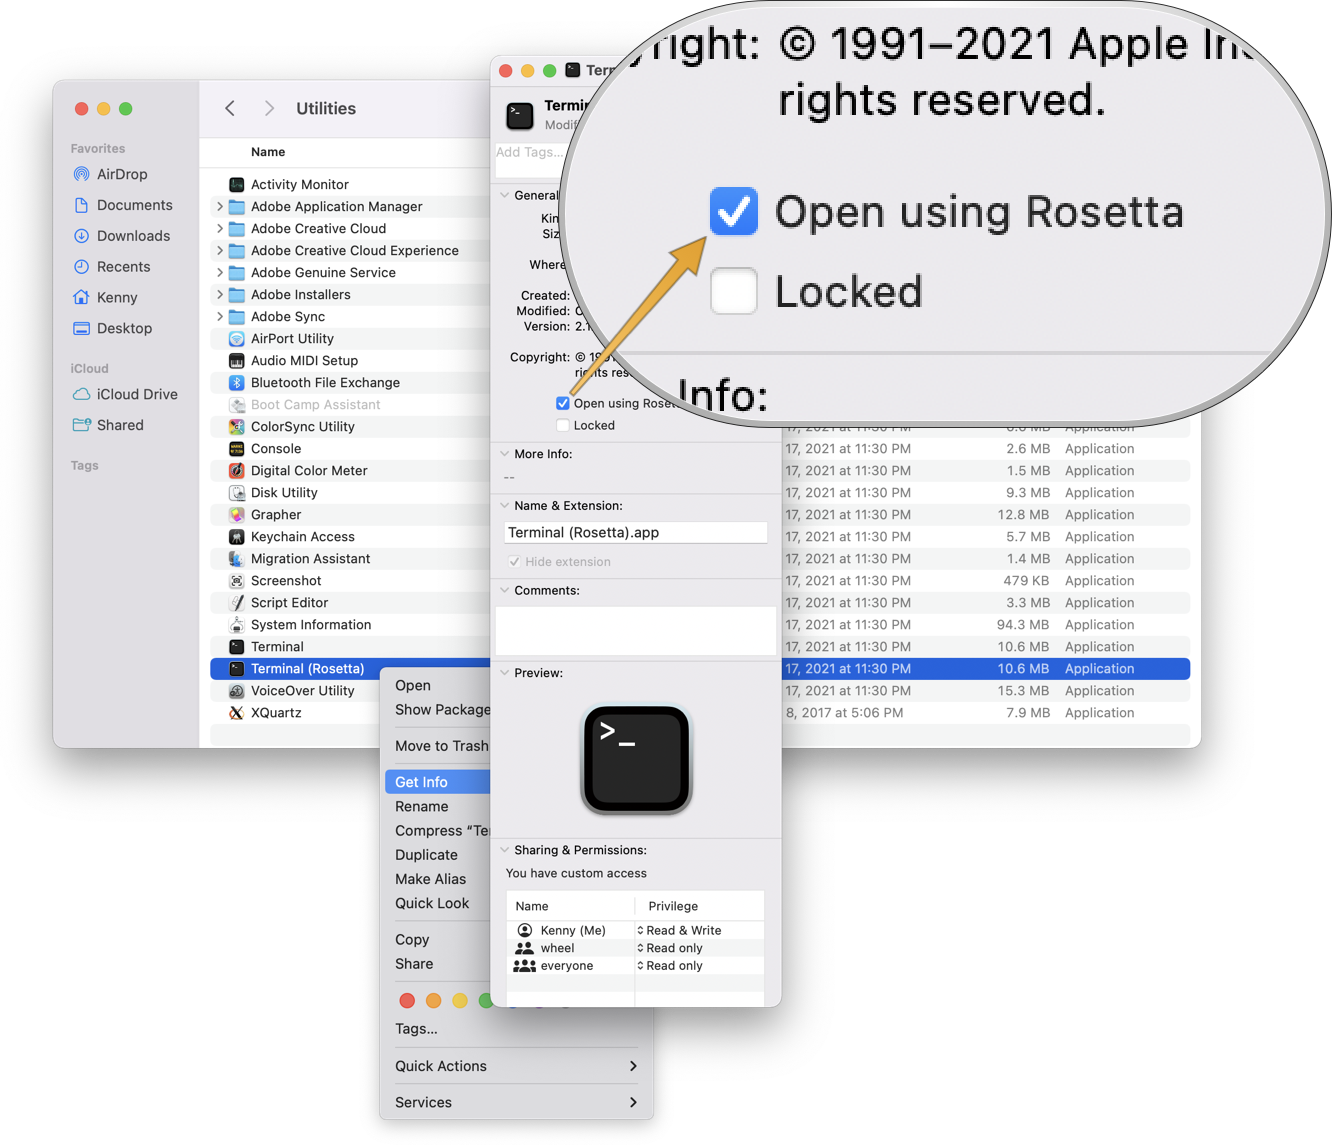
2.4: Right click on your new Terminal — Terminal (Rosetta) — and select Get Info.
2.5: In the Get Info Window, check the box Open With Rosetta.
3. Fix the Source Code
This may sound like the hardest part, but it's not too bad. The source code as-is does not compile, even in emulation mode. There are two lines of code that need to be changed.
3.1: Edit the macosx-starter.c file:
This file should be located at mit-scheme-11.2/src/microcode/macosx-starter.c.
Use the text editor of your choice and navigate to line 58. It should currently read:
pid = (vfork ());
The vfork command has been deprecated in favor of, simply, fork.
Modify the command by deleting the character 'v'. So line 58 should now read:
pid = (fork ());
3.2: Edit the uxsig.c file:
This file should be located at mit-scheme-11.2/src/microcode/uxsig.c.
Use the text editor of your choice and navigate to line 1197. It should currently read:
debug_back_trace ((outf_channel) to_dump);
This line won't compile. I'm not sure why, but it appears safe to comment out. Either delete the line, or simply add two slashes in the front of the line. I prefer commenting out:
// debug_back_trace ((outf_channel) to_dump);
3.3: You've now made the necessary changes to the source code, and you are ready to compile.
Using the Terminal (Rosetta) app, cd into the mit-scheme-11.2/src folder.
From there, run the following three commands:
				./configure
				make
				make install
Scheme should now be properly installed. You will not need to use Rosetta Terminal to run scheme, it was only needed for the compilation steps.
To confirm it's working, open a normal (non-Rosetta) Terminal window. Type scheme or mit-scheme. You should see the Scheme REPL, and you are on your way.
(Note: if you use this guide and run into issues, please feel free to contact me and I can try to help.)